20 February 2017

A Little Happy Sew Along ~ Home Sweet Home Mini Quilt ~ Introduction


I'm so excited to today to finally reveal my next 'A Little Happy Sew Along ~ Home Sweet Home'! Thank you so much for baring with me, I know I've been sharing sneaky peeks of this on social media for what seems like months!

Just like I did for the Christmas Sew Along, I'll be sharing the FREE pattern along with step by step instructions on how to make it,in weekly blog posts starting on Friday 3rd March....... how does that sound?

For my version I have used a gorgeous combination of Essex Linen, Mochi Dots, Frou Frou Cotton Lawns, Chambray and Woven Wool......PLUS I've added some pretty lace, velvet ribbon and a shell button.....so it has lots of interesting textures and the colours are so lovely and rich.......perfect for some winter stitches!

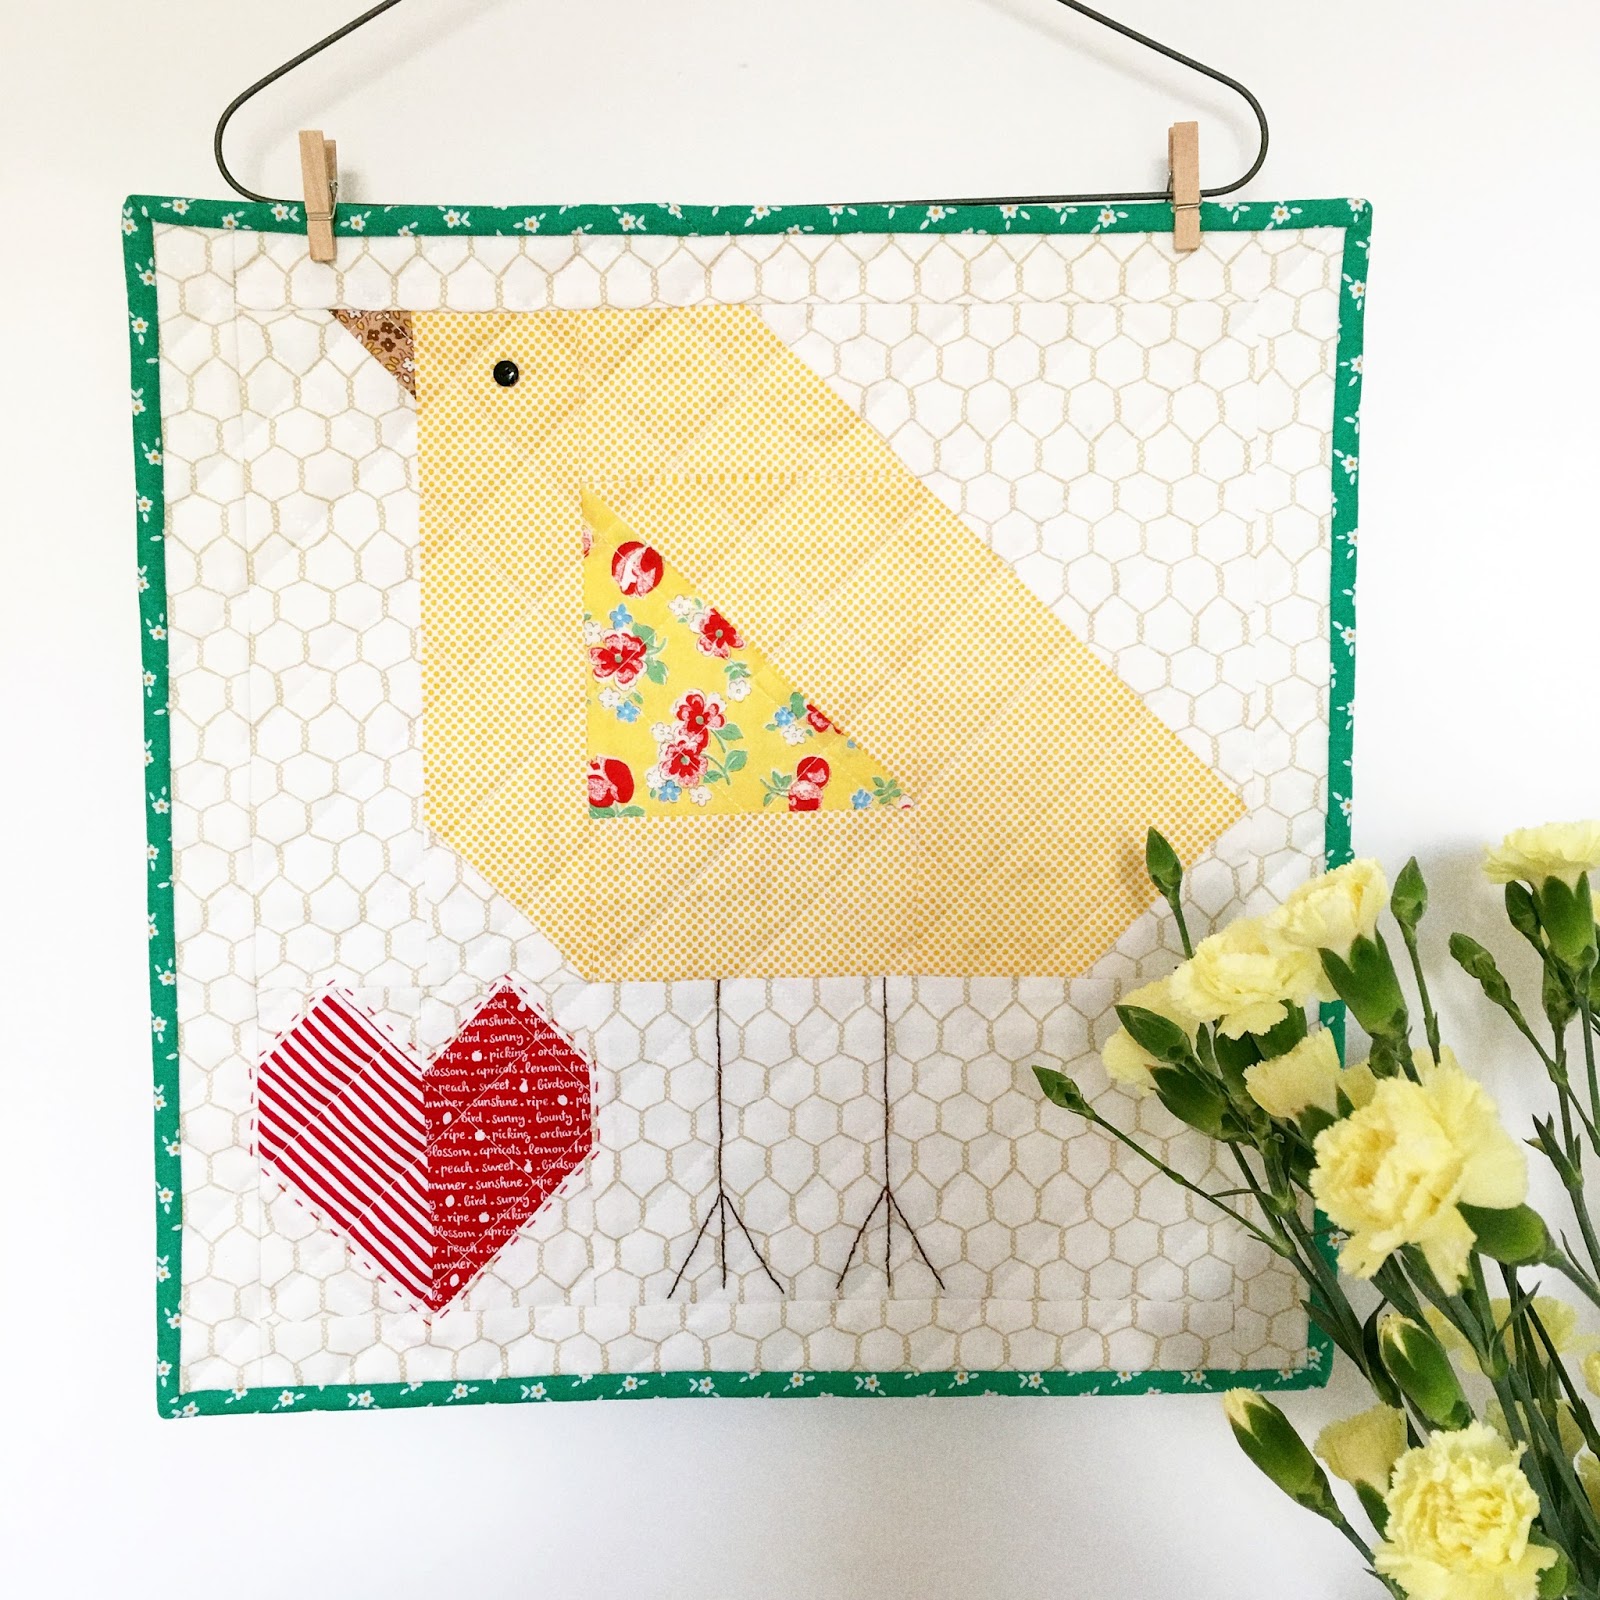
The finished quilt measures 15" square.

I know many of you have already pre-ordered a kit, which, with the exception of the threads, contains all the fabric, trims, wadding and backing fabric required to make your own version, just like mine.  If you contacted me to reserve one of these, expect an email from me later today.   Don't worry if you haven't pre-ordered, we will have a some additional kits available to order HERE.  These will all be posted later this week.

Obviously this project would also be an excellent opportunity to do some scrap busting, so go and gather!  Cutting instructions will follow in the first Sew Along post on the 3rd.

All of the hand stitches on mine were made using Aurifil Lana Wool, which if you haven't used before is a dream to sew with.  I use it for all my wool felt projects too.


I have put together a Thread Pack which contains the 11 colours I used and I'll also list all the individual thread colours in the Scrummy Supplies list at the bottom of this post, so if you already have some in your stash, you can add them separately.  I do appreciate they are an investment, but rest assured, once you've tried them there is no looking back.  Embroidery floss, would be a great alternative.
For those of you who have followed me for a while, will remember some of these appliques from my Little Kitten Homemade days.  The little toadstool house was one my best sellers and I really enjoyed recreating this version in woven wool rather than in wool felt.  (If you're stash busting and don't have any woven wool....don't worry, wool felt would look fab!)

So what's woven wool? I hear you ask.......... it's best described as a piece of fabric, with a weft and warp, just like normal cotton fabrics, but rather than cotton is made from 100% wool thread.  When it arrives at the shop it is gorgeously soft and would be lovely to use for many sewing projects......but to make it suitable for applique as in this project, it needs washing and drying to turn it into felted wool.  For all the kits that we're selling, I have carefully washed and dried the wool it at home so it's soft and plump and good to go!   The biggest difference for me between woolfelt and woven wool and what makes it aesthetically pleasing, is that it retains the woven texture and whilst it has been felted, there is still a teeny weeny bit of fraying caused by the threads, but for me this just adds to the charm!

So here's the schedule........


Obviously the aim of the Sew Along as always is to have fun and whilst there is a schedule by all means sew along at your own pace!  Don't worry, this will be a FREE project in the sew along section on the Blog HERE so you can return to it at any time.


As promised, here's a list of the SCRUMMY SUPPLIES I used:

'Home Sweet Home' kit (excluding threads) 
I used Aurifil 50wt thread in #2311 to piece my background
Individual Lana Wool Threads: I used the following colours: #8328 #8083 #8730 #8762 #8950 #8965 #8240 #8225 #8442 #8552 #8551


I hope you fancy stitching along with me!
Share:

14 February 2017

A little happy Tutorial (of sorts!) ~ Tilda Bumblebee Heart Mini Quilt


Oh what fun I had last night.  I decided late afternoon to finally cut into some of the new Tilda Bumblebee fabrics that I had bought home from the shop.  It's such a pretty collection don't you agree?


For my little project, I picked some of the lovely green and pink fabrics and then added in an Essential Dot by Moda and a Ticking Stripe from Bespoke Blooms by Brenda Riddle (also an extremely pretty collection!)

As this was a rather spur of the moment make I didn't take any 'in progress' photo's, but I thought you may like to know how I made it, so I thought I would talk you through the steps..... hopefully it will make sense!

From each of the 6 fabrics I had chosen, I cut a 10" long strip, but I varied the width of each.  I've given the width measuresment that I cut them at below......


With RST, I then sewed the strips together along the 10" length edge.  I then made a large heart template from some A4 paper, which I traced on to some light weight interfacing (I use Vilene L11 30).  I then placed this on to the right side of the fabric strips, machine stitched on the drawn line, and then cut out the heart, allowing for a rough 1/4" seam allowance all round.  More pictures and details on this process can be found in THIS BLOG POST.

Once turned through, I then machine sewed some pretty lace across the heart, allowing a little excess (aprox 1/2") either side, which I tucked under, when I appliqued it to a 12 1/2" square of background fabric, which by the way, was Essex Linen in Natural.

Once layered up with wadding and backing fabric, I hand quilted around the outside and across the heart in 3 places.  For this I used Aurifil 12wt in a pretty Teal shade #2845, which picked up on the teal Bumblebees and flowers rather nicely. 


To finish, I added some pretty vintage Mother of Pearl buttons from my stash and before adding the binding (which was a super crosshatch gingham, again by Brenda Riddle) I sewed some more cotton lace around the edge.

There you go, a really easy and super quick project.  I'm thinking how lovely would a quilt be made up of lots of these 12" blocks or maybe make the background fabric a little larger and turn it in to a cushion/pillow....must resist...must resist.........I hope that my instructions make sense, but as always if you have any questions, please do not hesitate to ask!


That's it for now, see you again soon!
Share:

9 February 2017

Farm Girl Vintage ~ Baby Chick Mini Quilt


As you know, I like to juggle lots of balls..... owning a quilt shop, pattern writing, block of the month prep, sew along prep, just a 'few' long term sewing wips and obviously and most importantly being a wife and mum.......whilst it is extremely good fun and believe me I wouldn't change a thing, every now and then I need a little 'me' time.  'Me' time normally means me saying that I'm going to my sewing room for an hour and only disturb me if there is an emergency (and can I just clarify that "mum I'm hungry, what is there to eat?" does not count as an emergency!).

Last week, I was in need of some 'me' time and fancied a quick project.  After making a cup of tea, grabbing a biscuit (don't judge) and perusing the book shelf, I pulled out the always fabulous 'Farm Girl Vintage' book by Lori Holt and decided to make up the Baby Chick block in the 12" size.   It's been on my radar to use the 'Chicken Wire' fabric from Farm Fun by Stacy Iest Hsu for Moda Fabrics since it arrived and could there be a more perfect block?  I also chose some cheery ditsy florals and blenders and away I went.  The block came together really quickly and to finish, I added a 1" border all round.

I decided to machine quilt in a cross hatch.  To do this, I used my Hera Marker to make a diagonal line from each corner to corner as my starting point and then quilted at 1 1/4" intervals using the quilt guide attached to my walking foot.

Once machine quilted, I felt it needed a 'little' something extra, so I added a smidge of hand quilting around the heart, for this I used Aurifil 12wt in red #2250.  I also used the brown 12wt #2360 to embroider the legs.

All in all I felt 'much' better after a little 'me' time!


I hope that you have a wonderful few days full of Happy Stitches!
Share:
© A Little Happy Place | All rights reserved.
Blog Layout Created by pipdig