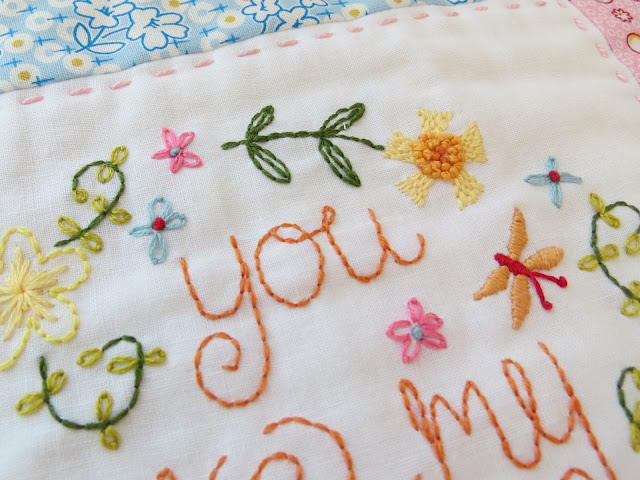
Sometimes, the easiest of stitches can be the most effective, I think Back Stitch certainly fits that criteria. It is a simple stitch used to create a solid line. It is up there as probably my most used stitch and is definately my stitch of choice for the text on my embroideries.
The following sketch shows what it should look like
and here is a very quick and easy guide on how I stitch it......

After making your first little stitch, using your stitch line as a guide, bring your needle through a little bit in front of stitch number one.

Now make a little backwards stitch, pushing your needle though to the back of the fabric at the very point of the original stitch.

Now bring your needle through to the front of the fabric again, a little bit in front of the second stitch and then take a backwards stitch and push your needle in and at the very point of stitch number 2. Then simply continue repeating this process.

The sampler pictured above was stitched entirely in Back Stitch and as a point of reference, my back stitches on the text measure aprox 4mm (1/8") and then are slightly smaller on the little flowers.
I hope that you found that helpful and if you haven't tried embroidery before, please do give this stitch a go, although be warned, embroidery is rather addictive and once you start, you will not be able to stop!!


A lovely clear tutorial Sarah and your photographs are beautiful!..You're really are tempting me to do some more embroidery...your designs are so pretty...
ReplyDeleteHappy Weekend,
Susan x
Thank you Susan, I hope that you have been enjoying the sunshine! Oh yes please do have a go, I am sure you would add your magical touch to them. Have a lovely weekend, Sarah xo
DeleteHi I'm writing a blog post on my top 20 backstitch inspirations. Could I use a link to your page for my post?
ReplyDeleteThanks
http://craftwithcartwright.blogspot.co.uk/