26 July 2014

A bit of this and a bit of that......

The summer holidays have arrived..... and so the juggling of being mum, business owner, crafter and blogger begins..... it's all good fun though!  The end of term also triggered a frenzy of teacher gift making.  I found a great tutorial for a quick and easy pencil case and put my scraps to good use.  Jamie chose the bright pink yellow and aqua combination for his teacher and Poppy went for the navy, red, green and pink mix..... I love them both for different reasons. 


For the Teaching Assistants I rustled up some little tissue covers using the bright and cheery Flower Sugar mixed with the lovely Sevenberry stripe in red (I can not tell you how useful these stripes and dots are!)

Poppy and I had great fun wrapping them using these free printables, I've started a board on Pinterest where I'm pinning all my favourites....let me know if you've found any good ones!!

The usual round of birthday parties continued.......my children both have the most amazing social calendar!  I made another pencil case as a gift which I filled with felt tips and other brightly coloured bits and bobs.....

I then remembered that I had some colourful alphabet beads so added these to the zipper, it was rather last minute so I'm hoping that they do not get pulled off by a zealous 6year old...eeeek!! 
I also found time over a cup of tea to do a little surfing......we have plans to decorate our kitchen this summer and I'm thinking a colour scheme of off whites, grey, pale blue...so I couldn't resist when spotting a sale bargain,  treating myself to this so so soft yarn.....I'm thinking another granny square blanket but simply made using alternate rows of the two colours...... I will show self control though and not start it until I have at least finished my other crochet wip!!  

As if I didn't have enough on my plate I was happily on Instagram this week, when one of my favourite bloggers popped up with a happy little tutorial and invited people to quilt a long...well I couldn't say no....... out came my Tilda scraps, of which I have a ton, and after a couple of  evenings of cutting, chain sewing and a little more sewing..... 
I have a quilt top ready to be basted and quilted....
So that's it for this week and I've just realised that I haven't taken any pictures or told you about the dress I've made for my brothers wedding....oh well I'll save that for another day!

Thanks as always for visiting and I hope that you'll bare with me over the holidays if my blogging becomes a little slower than usual.  I am however still posting daily on both Facebook and Instagram (which I just love!) and when I get the hang of it Twitter.....but it has to be said I am far to wordy for tweeting!!
Share:

16 July 2014

A little happy tutorial ~ How I back my Embroidery Hoops


It's been a while since I shared an embroidery tutorial, but I've been asked a couple of times in the last week how I back my embroidery hoops.  Over the years I've tried different methods, but this my tried and trusted way, so I thought I would share.......


Before you start your hoop art, fabric pen* the inner hoop’s contour onto a piece of felt, then cut out. * I always use an erasable pen, just in case I make a mistake! 


Once you've finished your embroidery, turn the hoop over and trim the excess fabric 1” ( 2 ½ cm) away from the hoop edge.


Using embroidery thread or something similar, starting at the top, stitch a row of running stitch around the seam allowance, ensuring that you leave a long tail at the beginning.


Once you’ve stitched the full circle, take the thread ends and pull them together to gather the fabric. Knot the thread in place to secure the pleats.  I have at time left my hoops like this, however when gifting them I always do the following.......


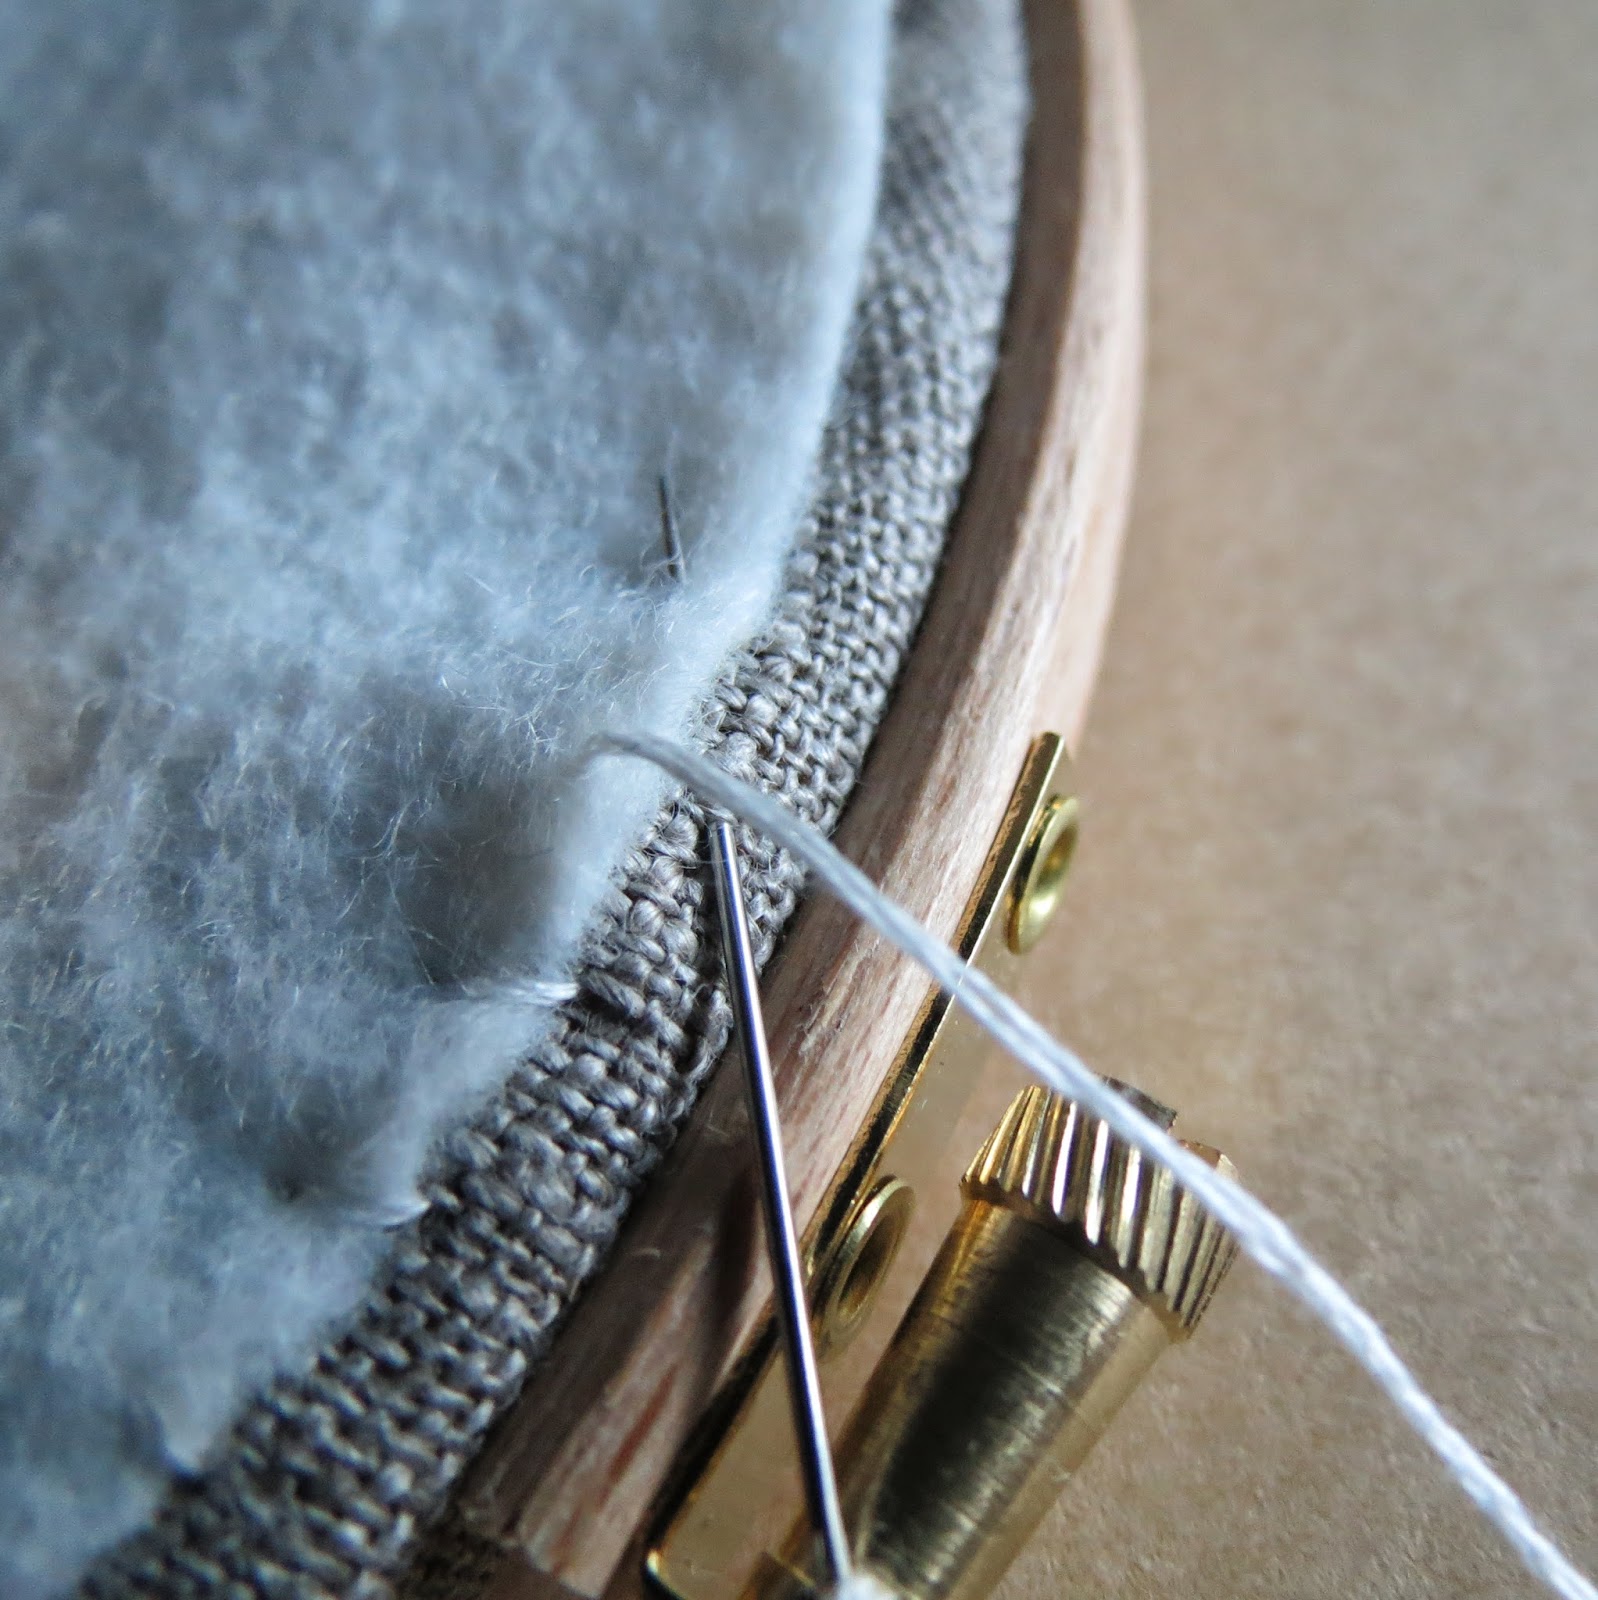
To neatly finish the back of your hoop, take the circle of felt you prepared earlier and Whip Stitch in co-ordinating coloured embroidery thread the felt circle to the gathered linen below.

Ta Dah.......that’s it the back of your hoop is all lovely and neat. Hang in place, stand back, admire and enjoy!!!

In case you're interested, the piece I backed was my Autumn Leaves Hoop, which you can read all about HERE.
Share:

3 July 2014

Happy


This cushion makes me feel happy...... it may have taken me ages, I started it way back HERE.....and that burst of happiness I felt when I started, continued throughout every little stitch...... and continued right up to the moment when I slipped on the cover and plumped up the inner.  My only regret, I did't learn to crochet years ago....but thank goodness I can now....all be it very slowly! 

Edited to add: I've just seen that Drops Muskat I used is on offer HERE.


Share:
© A Little Happy Place | All rights reserved.
Blog Layout Created by pipdig