As always when sewing the leaves and flower elements, I used the interfacing method of applique. You can see more of how I do this in THIS TUTORIAL.
I thought it might be useful to show how I use the bias maker, so here you go.........
First off you need to cut a strip of fabric. Now here's a really important bit of information.......if you need the finished stem to have a curve in it, like they do for the spring flowers and on the circular block shown below, you need to cut the fabric on the bias.
If the stems are going to be straight, like they are on the bunny block, you can cut these on the grain.
As I needed the stems to gently curve, I cut them on the bias. To help you establish the bias, there are some hand marks on your quilting rulers. Can you see the black line on the quilting ruler below as indicated by the blue arrow. This line runs at 45 degrees to the outside edge of the ruler, as indicated by the red arrow. So if you line up the 45 degree line with the grain line of your fabric, the outside cutting edge will cut on the bias. For this tutorial I had a square of fabric cut at 5 1/2" but without meaning to state the obvious, the larger the piece of fabric, the longer the strip.
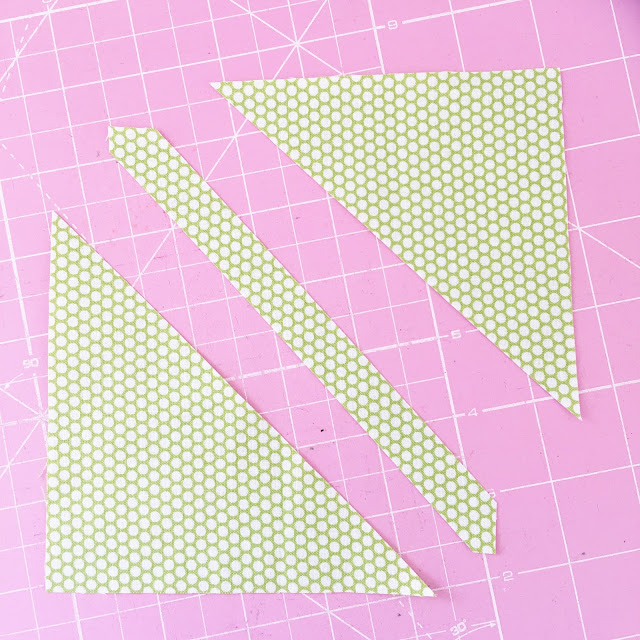
I then lined up my quilting ruler along the first cut line and made my second cut at 5/8" wide.
I used the waste fabric either side of the strip to make my leaves.
Having made quite a few bias binding strips, I've found it handy to cut a little 'V' at one end. This makes it so much easier to intially feed the strip in to the bias maker. Take care when handling the strip, so as not to stretch it.
When feeding the fabric in you need the right side of the fabric facing the side of the bias maker with the long slot, as shown in the picture below........ I find it helpful to gently use the tip of my scissors to help it on its way, but please do be gentle so as not to damage the fabric.
EDITED: I have found when making bias stems from Tana Lawn, it has been useful to spritz the fabric with Mary Ellen's Best Press, which is a starch alternative , prior to using the bias maker.
Feed it through until it's just peeping out....just enough so that the tip of your iron can get hold of it.
Then flip the bias make over and grab the little handle. This will keep you fingers out of harms way, believe me you do not want to hold it further down or you will burn yourself (don't ask me how I know!). Then gently pull the bias maker whilst ironing the strip as it is slowly revealed ......
...... and you will get a lovely neat strip of fabric with the raw edges neatly tucked under... fab isn't it!
I then positioned the stem on to my background. You can either do this by eye as I did or you could mark the position with a fabric pen and then lay the bias on top of the pen marks which is what i did to get that perfect circle on wreath applique. I use Clover applique pins to hold it in place.
I should just mention the raw edges at the top and bottom of the strip...... make sure that you allow a little excess on the top of the stem which will be hidden underneath the flower head. The bottom end, needs to overlap the bottom edge of the background fabrics, I tend to cut away most of the excess once it's pinned in place and then once appliqued I trim it to the same level as the bottom edge of the background fabric. This will eventually be caught up in the seam allowance.
Just a little reminder, remember to match you thread colour to your applique fabrics rather than the background fabrics and keep your stitches as small as you possibly can.
Should you require them, both sizes of Bias Maker and the fab Applique Pins, can be found on the website.
Happy stitches!


I really needed this tutorial as I have some stems to get around to eventually on an appliqué quilt. Thank you.
ReplyDelete