A few weeks ago we launched our brand new Fabric Monthly Subscription Club, called the 'Rainbow Fabric Club' . We announced it on social media and by newsletter and had a great response and the places filled up super quick. However we have subsequently received quite a few request to join, so after a few calculations, we are delighted to announce that we will be able to reopen the club for a few extra members!
Each month (until March 2019), you will receive a gorgeous bundle of cherry picked pretty fabrics through your letter box. Your monthly bundle will contain 9 different quilting weight fabrics including gorgeous florals (of course!) and blender prints (dots, stripes, text etc) from a variety of your favourite fabric houses, Moda, Riley Blake Designs, Penny Rose Fabrics, Windham, Marcus Fabrics, Dashwood... all carefully chosen and cut by us Fat Eighth size pieces.
As the club title suggests, included in your bundle will be a delightful mix of rainbow colours red, orange, yellow, green, blue, indigo and violet...plus a little Pretty Fabrics and Trims twist....the addition of pink and grey. Within each colour over the year you may receive a variety of shades, so for example, in green, you may receive shades such as mint, olive, grass green etc and blue and indigo may include baby blue, aqua, teal, royal and navy..
Obviously you are totally free to use the fabrics for which ever project you so wish..imagine a Rainbow Queens Walk quilt or a Rainbow Poppsy Doodle Dandy quilt! I did however think it would be fun to design a new quilt..... so here you go..introducing the Rainbows Kisses Quilt.
The pretty quilt combines classic nine patch blocks mixed with a pretty appliqued centre, doesn't it look quite different depending upon how you choose to lay out the blocks....in rainbow order or randomly. The completed quilt measure 76 1/2" square.
Rather than computer generated appliques shown, I will be adding some hand drawn appliques so it will look slightly different and unique from the computer images. Obviously it goes without saying that the real quilt will have a wonderful spectrum of colours rather than the flat colours shown!
Here's the schedule for when I'll be sharing the various stages to make the quilt:
Today ~ Is all about the 9 Patches
Obviously feel free to use fabrics from your stash! I know from Instagram that some of you are thinking of using some of your fabrics left over from the Flirty 30's Club....great idea! The important part is that you have lots of happy stitches!
LET'S GET STITCHING
BEFORE STARTING Always Remember to:
1. Read all instructions before you begin.
2. RST means right sides together.
3. All seam allowances are 1/4”.
4. FWOF means width of fabric.
5. If you need help, please do get in touch!
Today I'm going to talk to you about the 9 Patches. I love 9 patches, such a classic and easy block to make and one that feels both traditional, yet modern.
In addition to the 'Rainbow' club fabrics, you will also need a Background fabric. If like me you are planning on using just one fabric (I've chosen Bella Solid in Off White), I would allow 5 metres. You may get away with less depending upon how economically you cut.
You could alternatively use a whole host of low volumes.....I look forward to seeing what you choose!
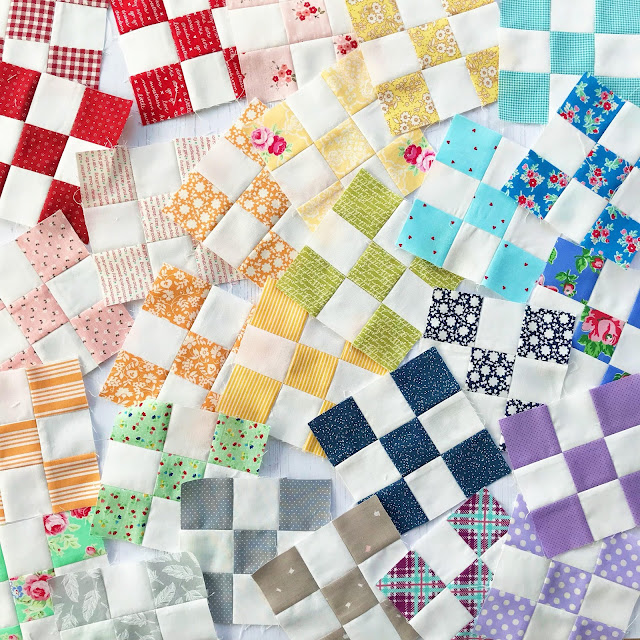
I've made a start on my nine patches (benefits of curating the club)......
In total for the quilt you will need to make 84 Nine Patch blocks, this is regardless of whether you choose to make the Rainbow Kisses quilt in rainbow order or random order. This is broken down in colours and quantities as follows:
I am going to make one 9 patch each month from each of the 9 fabrics received in the Rainbow Fabric Club bundle. So in 10 months time I will have all the 9 patches made..... a nice and steady amount to make each month!
Here is how each block is made.....
For each individual 9 patch you will need to cut 9 squares each one measuring 2" square.
So for example, to make this:
You will need to cut:
(5) 2" squares from a red fabric
(4) 2" squares from a background fabric.
A little happy top tip...... The most efficient way to cut the background squares, is to cut a 2" strip FWOF and then subcut this into 2" squares. In total to complete the (84) 9 Patches required for the quilt, you will need to cut (18) 2" x FWOF strips and subcut each of these into (20) 2" squares. This will yield 360 squares, so there will be a few extra's for your next project!
To piece each 9 patch, lay out the 9 squares into 3 rows.
With RST sew the 3 squares in each row together. Remember to use a 1/4" seam allowance and as usual I had Aurifil 50wt in #2311 in my machine.
Press the stitches to 'set' them , then press with the seam facing in the direction as indicated by the arrow. By pressing the seams in alternating directions on each row, when it comes to sewing the rows together in the next step, the seams will 'nest' together, helping you to achieve nice matching points!
With RST, sew the rows together. Press the stitches to 'set' them, then press the seams open.
The completed 9 Patch unit should measure 5” square.
It's a simple as that! I'm going to decide upon my final layout once I have made all my 9 patches.
I hope that you will sew along with me.
Happy Stitches!


